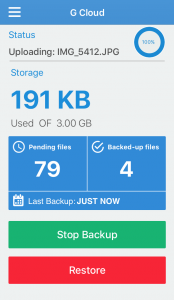
- From Google Play Store, download and install the GCloud app on the device.
- Open your GCloud app and select the proper way to sign in to your account, depending on the method you’ve used when you created it. (Email/Google/Facebook)
- Once logged in, tap the menu icon
 at the upper-left corner.
 - Tap the Restore option.
- Start browsing the content of the backup → Select what to restore by long-press on it → Tap the Restore button.
If the requested data is not archived, it will start downloading instantly. Just give the GCloud app all the needed time to finish its work.
However, if the requested data (or some of it) is archived, you will notice the red cloud icon showing on your GCloud app as below. Those archived files will need from 3 to 12 hours to un-archive them for you.
Once those files are un-archived, you will be notified in three ways:
- A pop-up notification from the GCloud app will be sent to you to inform you that “Files ready to download”. Just repeat steps 1 to 5 above and the files will start getting restored. This is the recommended way to do a mass restore.
- Emails from GCloud <noreply@gcloudbackup.com> will reach you. You can check those emails and use the links within them to download selected files.
- The red cloud icon
 under the GCloud app will turn into a green one
  . You can also tap on it and start downloading selected files.
- From Appstore, download and install the GCloud app on the device.
- Open your GCloud app and tap the Already have an account? Sign in option.
- Select the proper way to sign in to your account, depending on the method you’ve used when you created it. (Email/Google+/Facebook)
- Tap Restore.

- Select the device you want to restore from.
- Select the data you want to restore.
- Tap the Restore button
- Tap proceed to confirm the restoration process.

